Saturday 16 November 2013

My...ehhhhh...Dylan's T4 project!

The van's been getting a little bit of loving over the past few weeks, now that the Mk2 Golf GTi is finished and tucked away for the winter.

Don't be fooled by the fact that Dylan seems to be doing all the work in the pics, it just looks that way!

Flashband was applied to all the interior panels, for sound deadening.

Cutting the Thermawrap to size, for the first layer of insulation.

Gluing the Thermawrap in place as an insulation base layer.

Gotcha! Smile for the camera! This kid of mine has a better approach to hard work than some adults I've worked with over the years!

First layer of EarthWool being stuffed into the cavities over the base layer of Thermawrap - these are readily available from all good building or construction suppliers.

Double layer (for extra toasty warmness and insulation!) EarthWool being covered with another layer of Thermawrap, and held in place with good old duct tape, the serial killer's favourite!!!

In some places, it can be awkward to get the EarthWool to stay in place while you cover it and tape in place with Thermawrap - we laid strips of duct tape over it to hold it in place...a second pair of hands really helps too!

OK, so that's all the insulating for now; here's a nother fairly straightforward How-To which will make a world of difference to your van!


How to fit SAAB seats to a VW T4 van

Step one, remove single seat base - its only held in with four nuts. I replaced my passenger double seat base with another single seat item. Some people cut and weld their double seat base down to suit a single seat, but this method is a bit simpler.

Step Two, measure, drill and bolt two adapter plates to the existing bolt holes in the seat base - from memory, I think these plates were mild steel and were 75mm wide, 450mm long and 3mm thick. Measure your own seat base and the bolt holes of your new seats to ensure a correct fit!

Step Three, fit new seat (mine came from a scrapped 2005 SAAB 9-3, but I think most SAAB seats will suit - make sure before you purchase!) slider mechanism to your already fitted adapter plates - this is removed from underneath the SAAB seats quite easily by removing a few bolts and unhooking the seat sliding mech(anism) cable. It also make it easier to bolt on the new seats too, as you need to slide the sliding mech forward and back to mark the adapter plates before drilling them. I did the front two holes first, bolted them loosely, then slid the mech back, marked the plates for drilling to fit the rear bolts and then drilled/bolted them in place.

Step Four, bolt new seat onto its own sliding mechanism - so simple even I could do it!

Step Five, bolt seats (fitted to VW original bases) into your van. Sitting pretty, and a damn sight more comfy that the original worn and battered items!

Just a note to make life easier if you're planning to do this yourself - the single seat base sits straight onto the original bolts for the double seat base, so there's no need to drill additional holes in your floor! The VW seatbelt buckles fit the SAAB seatbelt receivers mounted on the seats too, so no need to change them either!

Right, that's all for now.

Drive safe,
RV.

Oakie Dokey - Restoration to Roadtrip! Part three!

Ok, the clock kept ticking, weeks had passed since I had even swung a spanner in anger, and I was getting nowhere fast.

My time was taken up with work, trips to hospitals in Waterford and Cork, and the car was low on my list of priorities.

My daughter was home and she was stable, awaiting further advice and treatment from the neurological team (thank you all for the good wishes on her behalf, by the way, much appreciated - I've been literally blown away by all the support people have shown over the past couple of months).

After a few texts to a few friends in VAGE, the cavalry was called in...I finished work at 7am one Sunday morning in late June, and just after I dragged my ass outta the cot at lunchtime, a convoy of VAGs pulled into my drive....enter Johnny Fennell, Cian O'Connor, Donie Browne and Tony O'Connor; all were armed to the teeth with spanners, socket sets and an admirable selection of hammers, the most important tool you can have when dealing with old VWs!

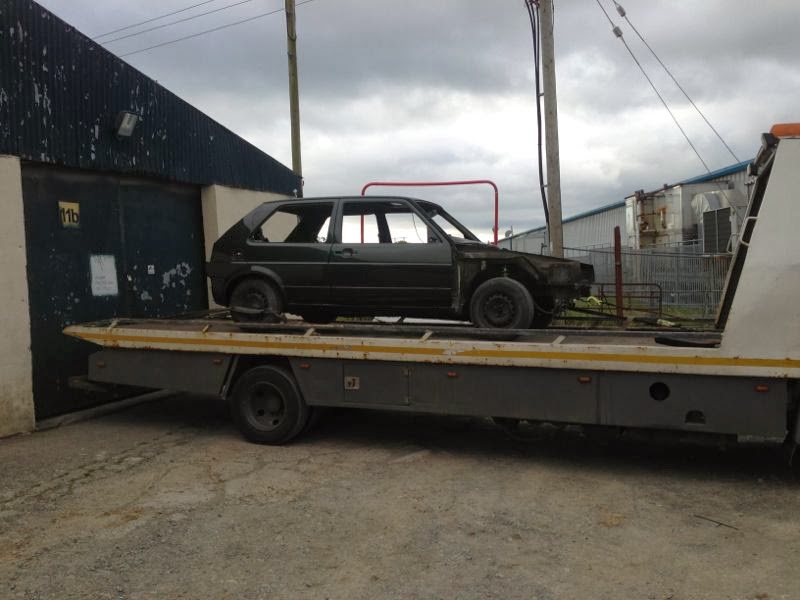
I filled the lads with tay and ham sandwiches and we made the short trip over to the workshop where Oakie had sat unattended...

By 11pm that night, we had engine and gearbox, new wishbones, new track rod ends, new front and rear wheel bearings, new droplinks, exhaust system and manifold, new front and rear bumpers, lights and a whole pile of other parts installed.. I'll let the pictures of that hectic day do the talking!

Ok, so this shot's ever so slightly staged! HAHA!

Donie and Cian giving the brakes a good seeing to!

 Again, Donie and Cian...this time adjusting the front subframe and making the new wishbones and bushes fit...with some hammers!

Johnny and Tony lying down on the job? Nah, They're making an uncooperative rear bumper fit.

11PM that night, everyone gathering their tools for the weary drive home after an epic day's work!

 I went back to work for another shift rotation; every spare minute was spent over in Cookie's workshop, fitting parts, removing them, trial fitting, setting bits up, bolting them on...you know the score.

The final stages of any restoration or rebuild are always the most frantic, fitting all the fiddly little bits and figuring out where those few little pieces go, the fine tuning, gentle persuasion with a hammer, it goes on and on....

On Monday, July 1st, the car still had no wings, bonnet, glass (apart from a new windscreen), tailgate, etc. - they were still in Robbo's workshop!

The engine was still not plumbed in for coolant and the entire loom was an unholy mess, due to some 'inventive' wiring that had been performed over the years, adding alarms etc.

Brakes were still to be fitted and bled, the engine needed a full set of fluids and filters, and we still hadn't even turned the key...hell, there weren't even any relays or fuses in the car!

In some of the most selfless acts of generosity I've ever experienced, two men dropped everything and put their lives on hold for the four days leading up to the Inters trip....remember, this car was meant to be driving onto the ferry at 8am on the morning of July 5th!

Donie Browne slept in my spare room and put in 16hr days all that week with me, up at dawn and falling into bed when the sun was rising the next morning, finishing the car...brakes, steering, engine work, all the heavy duty stuff I can't do anymore since a back operation a few years ago.

Padraic Bolger (Podsy on here and the Irish aircooled forums - check out some his work with his company Customvolkz on Facebook) is an electrical/electronics genius...he also happens to be my cousin! Every day, he arrived in his T25 camper (complete with Audi Allroad V6 2.5tdi conversion) to tackle the mess of wiring, bad connections, corroded contacts and broken earth points, and practically rewired the car in a couple of days....he even renewed the wiring that would be hidden under the carpets and wrapped it all sexy new loom tape, doing a better job than when it left the factory!

While all this was going on, Robbo arrived and we refitted bonnet, wings, tailgate, glass, trim, everything that had been scattered around the workshop in boxes!

Dylan, my 13yr old son, cleaning up after all the bodywork...Jesus, that dust gets everywhere!

Taking shape, slowly but surely!

Engine plumbed, radiator fitted, lights in.

Not driving yet - we pushed her out in the sunshine to get some daylight while we were working!

Taking shape nicely now.

Robbo carrying out the final touches, polishing the freshly painted and refitted panels.

If you squint, it looks just like a Golf!

That's more like it!

A hive of activity, hidden behind all those vans! Who's the little fecker photobombing in the corner??!!


The last day came and we fired her up....nothing....it was a real 'OH 5HITE' moment...had all this hard work and generosity by all the lads been for nothing? I was getting ready to ring the ferry company and tell them I'd be showing up Friday morning in my battered old T4, I was broken and defeated, mentally and physically at this point.

Undeterred, Donie and Padraic went digging in the bowels of the car, found the problem, and we tentatively poured some more petrol in the tank and turned the key again...SUCCESS, she fired first turn, gave a little cough and settled down into a healthy, throaty burble through the Magnex stainless system.

The last few hours are a total blur, refitting interior, Robbo refitting the sunroof, being more careful than a bomb disposal expert, in case he scratched any of his meticulous hard work, Padraic feverishly running wires everywhere, rewiring lights, stereo, replacing relays, dismantling wiper and window motors and rebuilding them; it truly was a sight to behold!

10pm came and we were done....there was nothing more to do than torque wheelstuds, clear all the tools and oily rags out of the way and drive her out of the garage....would she run? would the brakes work? would she change gear?

She rolled out under her own power into a beautiful summers evening...here's a pic of that moment..
Words can't express how that felt...she ran smoothly, stopped briskly, drove perfectly, everything worked as it should and it was all down to the hard work and generosity of a few good men. 

So, did she make it to GTi International? Read on...

6am, Friday5th of July; time to head for the ferry.
We threw our gear in the back of the Golf, said our goodbyes, and jumped in...me and Dylan were a little nervous to say the least...last nights shakedown run had consisted of the ten minute journey from the workshop to home with Padraic driving behind us in case she calved! Was it enough? Would she die on the road to Rosslare?

I'll let the pictures do the talking...

 Parking up on the ferry to Wales.

Nice Arse.

On the road, somewhere in the UK

On the VAGE clubstand at GTi International, Stratford-Upon-Avon.


That weekend, we covered 700mls in 30+ degrees celsius heat. Oakie suffered nothing worse than a leaking heater matrix and a rear roundel badge which fell off due to the intensely hot weather melting the glue....not bad for a car lashed together in a couple of weeks!

Thanks again to all the lads for their help and perseverance, I couldn't have done it without ye.

Later folks, drive safe,
RV


Who's the smug fucker???


Oakie Dokey - Restoration to Roadtrip! Part two!

In mid-June, the car came back from being painted; Robbo had been sending me teaser pics for a couple of weeks during every stage of the restoration and remedial work he was performing...

Out of the spraybooth...look at that shine!


On the truck, ready for the short spin out to Cookie's workshop where the rebuild would take place...


While the shell had been delivered back, Robbo continued to work on all the removed panels to finish them to the same high standard he had achieved with the shell...actually, he told me I couldn't have them back until the engine, gearbox and interior were in, in cased I scratched any of them! As if I would!

The final stages in the spraybooth...


So there I was, three weeks away from Inters; I had a newly painted shell, an engine and gearbox on the ground beside it, boxes of spare parts and new service kit, my entire interior including carpets was 30 miles away being cleaned, sanitised and renovated by Larry in Cleancar, after being covered in dust and mouse droppings for a decade ...

There wasn't a hope in hell this car was gonna be ready, everyone said.

Or was there...


Oakie Dokey - Restoration to Roadtrip!

Hello there, Occasional Reader! It's been a few months since I've been on here, waffling on about old VWs, life, the universe and everything...there's been a lot going on in the background, which I won't go into right now.

There's also a lot done with one of my projects, so, settle back and read on.

Previous posts have hinted at progress back in the spring and early summer, but they don't tell half the story...

Okay, so we know that I took a trip to Cian's lock-up and cannibalised his Mk2 for a van load of parts, we know that Robbo was gonna take her away to throw a quick couple of coats of paint on to spruce her up and we know that I had started the stripdown in Cookie's workshop.
Here's the full story...

The stripdown started in April and the future seemed bright. My target of having her ready for the VAGE annual trip to GTi International was on track.

New back axle, brakes and suspension were fitted, old engine and gearbox were out, underneath was cleaned and resealed for future protection against the elements.

Robbo (Alan Robinson, proprietor of Robinson Autobody & Recovery here in Waterford) took the shell away to work his magic. Over the next few weeks, he started sending me pics back, just to tease me...the prep alone took a full week of filling, sanding, filling, rubbing down, till the body work was smoother than a politician's promises...


While all this was going on, I kept myself busy with the restoration off all the bits of the car that were going to be kept, as well as some parts that I had picked up along the way, namely plastic trim that I picked up from my good mate Danny Healy, a set of G60 steels that had been expertly banded by Noel Walsh, welder extraordinaire, and a few other bits n bobs.

To bring the wheels back to their former glory, I first sanded them back to a smooth finish, then treated them with this stuff...
Dinitrol rust converter, supplied by Larry in Cleancar.ie....check the website out; it's an Aladdin's cave of everything you could ever need for the protection and maintenance of your vehicle, added to the fact that Larry is one of the soundest people you could meet, always willing to give advice on whatever questions you might have. This Dinitrol stuff is epic; it sprays onto corroded metal and as it cures, chemically converts the corrosion into an inert metal, ready for repainting, with no risk of the dreaded tinworm returning if you do the job right! Highly recommended! 

A Word of Warning - make sure you wear one of these when doing any spraying, as some of the chemicals you need to use for this kind of work can seriously fuck you up!

Yes, I look a twat, but my lungs still work!

So, back to the wheels! I coated the Dinitrol treated wheels with Hycote grey primer once the rust converter had cured - you know this is done as it turns a blackish purple once it has done its job properly; you can see this is the pics below. Two coats of primer were applied, followed by six coats of my colour of choice, Plastikote Metallic Pewter hobby paint, which gives a lovely satin finish. 


Each coat was given 15mins to become touch dry before laying on the next; remember less is more here...several light coats will always give a much better finish than a few heavy coats, with less risk of runs and having to do it all over again! The pics below show the different stages of wheel restoration.


I also got the plastic trims restored; these only needed some light rubbing down with red scotchpads, then a good clean with Halfords own brand bumper preparation spray, followed by plenty of coats of their Black Plastic Bumper Paint...


...this stuff gives a fantastic, hard wearing finish when done properly with a bit of patience and correct prep.

Before...

After...

The last bit of spare part restoration was the front crossmembers, slam panel and radiator fan shroud; these were rubbed down with a wirebrush and red scotchpads, then sanded to a smooth finish. Once again, because they has a lot of surface rust, the Dinitrol was applied, then a couple of coats of Hycote grey primer and they were finished with Hammerite gloss or satin black rattlecans. This gives a fantastic finish that lasts well.


 The way things were going, I was gonna be finished way in advance of my target date...

Then, out of the blue, we were broadsided by disastrous news.

Sarah, my 23 year old daughter, became seriously ill and was rushed to hospital. It was a rough few days of hospital wards, tests, nurses, doctors, more tests, waiting...the news just kept getting worse and worse. I felt like I had been hit square in the chest with a sledgehammer. Looking back now, it was very tough time and I have to thank those of you in the Irish VW community who have showed so much support over the past few months, you know who you are.

Needless to say, everything else in our lives went on hold last May...